Cool Drawings of Eyes With Color
In this lesson, we'll look at drawing a realistic eye with colored pencils. If you want to check out the basics of drawing an middle with graphite pencils, please have a expect at the following lesson...
- How to Describe Optics
Colored pencils are a powerful medium for creating art. I definitely did not realize this when I first used them. I thought that they were not bad for sketching, but non actually capable of producing rich and bright colors.
Only overtime, I have learned merely the opposite. Colored pencils tin can be used to produce incredibly vivid imagery with stiff colors. Clearly, they are much more than a medium reserved for sketching.
Creating a Painted Look With Colored Pencils
The secret to producing a "painted look" with colored pencils comes from the application approach and what I like to call "the magic of burnishing".
Colored pencils require multiple applications of colour. Using just i color usually results in an artificial look. In dissimilarity, layering multiple applications of color adds depth to the color, making it appear more natural and realistic.
Colored pencils are designed to be built up to a heavy application. Although y'all tin use them anyway that yous like, I have found that heavily applying the colour produces a more desired result.
With each progressively heavier awarding, the binder becomes thicker on the surface, creating a "buttery" consistency. This waxy build up allows the colors to blend and layer easily. This allows the artist to create smooth gradations between colors and values. Colors can be gradually adapted for this reason as well.
A Bit of Burnishing
Once the surface has reached this "waxy" consistency, burnishing tin occur. Burnishing is basically polishing the waxy build up so that it is completely filling in the "tooth" or texture of the newspaper. This creates an even surface that is normally "slick" to the affect.
Burnishing can be achieved in several different ways. Lighter pencils such as white and cream can be used to work the color into the surface. For darker colors, a colorless blender can be used. Solvents tin also be applied using a castor. We take a much deeper await at burnishing colored pencils in The Colored Pencil Form.
Colored Pencil Materials Used in this Demonstration
(Some of the following links are chapter links which means we earn a small commission if yous purchase at no additional cost to you.)
As far equally colored pencils go, there is swell disparity amid brands. The quality of the pencil depends greatly on the binder used and the concentration of pigment. The quality of the wood that encases the pencil as well plays a function. To compare colored pencils brands and types, I advise you cheque out the colored pencil comparison chart, which includes my recommendations.
My personal favorite among all brands and types (and the pencils used in this sit-in) are Prismacolor Premier pencils. They are a bit pricey, but well worth the investment. The quality of the pencil volition e'er play a function in the overall success of your work.
Although some will argue that the quality of Prismacolor has declined in contempo years, I haven't found this to be the case. The pigment is still very rich and the binder is infrequent. Layering and burnishing are very easy to reach, even for a beginner.

Step past Step How to Draw a Realistic Eye With Colored Pencils
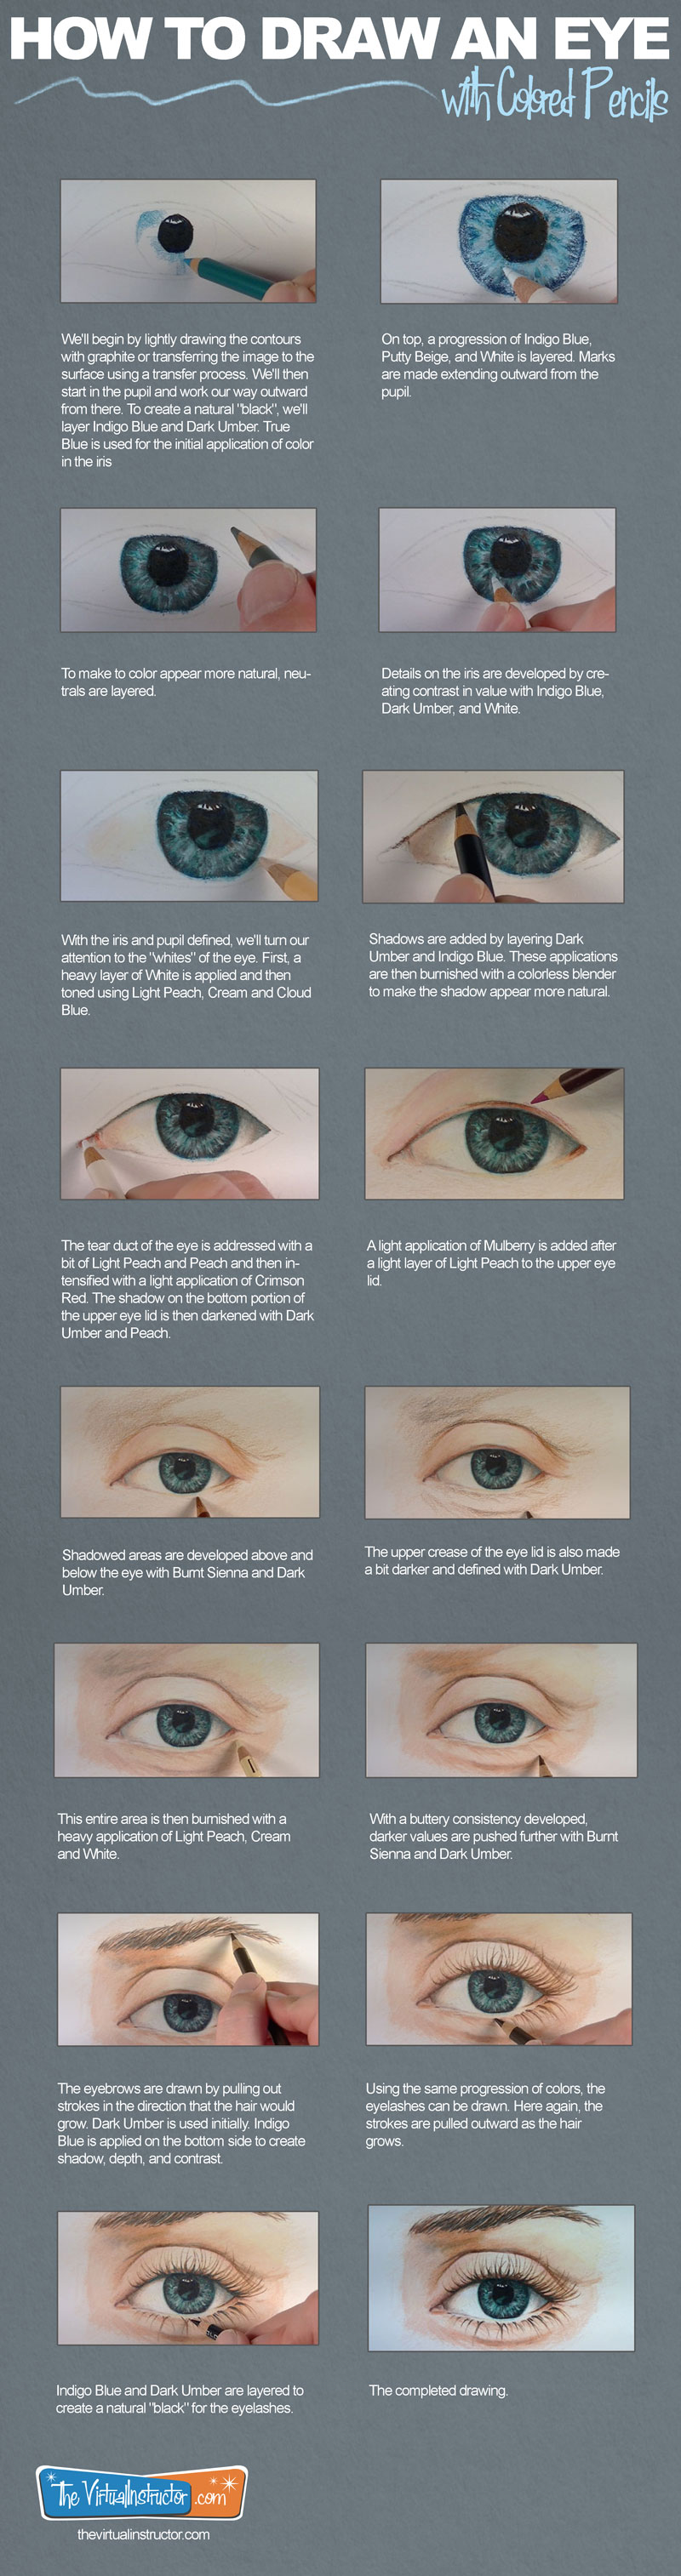
We'll begin by lightly drawing the contours with graphite or transferring the image to the surface using a transfer procedure. We'll and so get-go in the pupil and piece of work our way outward from there. To create a natural "black", nosotros'll layer Indigo Bluish and Dark Umber. True Bluish is used for the initial application of color in the iris. On top, a progression of Indigo Blue, Putty Biscuit, and White is layered. Marks are fabricated extending outward from the student.
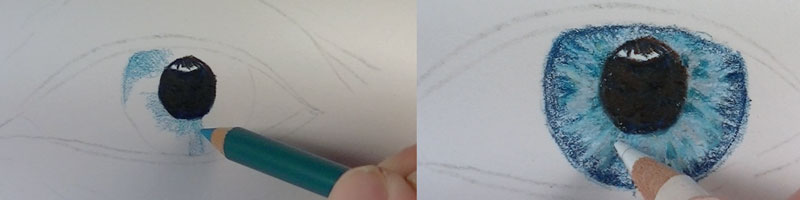
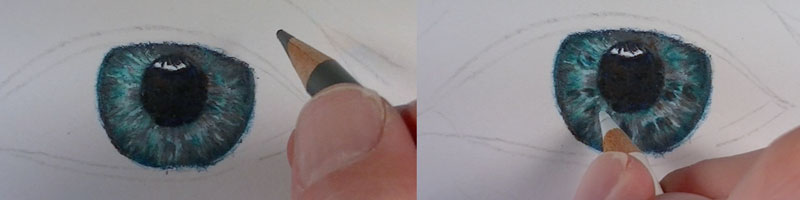
To make to color appear more natural, neutrals are layered. Details on the iris are developed by creating contrast in value with Indigo Blue, Dark Umber, and White.
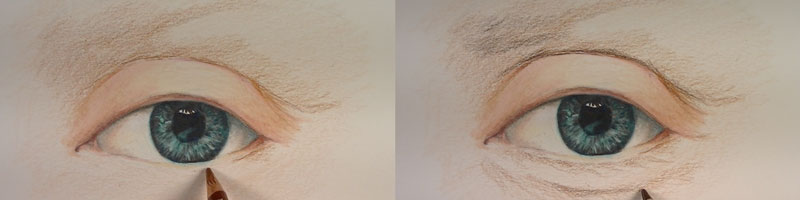
With the iris and educatee defined, we'll turn our attention to the "whites" of the centre. Get-go, a heavy layer of White is applied and then toned using Light Peach, Foam and Cloud Bluish. Shadows are added by layering Dark Umber and Indigo Bluish. These applications are so glassy with a colorless blender to make the shadow appear more natural.
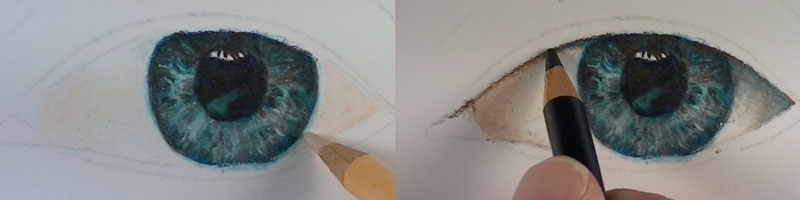
The tear duct of the eye is addressed with a bit of Low-cal Peach and Peach and so intensified with a light application of Reddish Red. The shadow on the bottom portion of the upper heart hat is and then darkened with Night Umber and Peach. A light awarding of Mulberry is added afterwards a light layer of Low-cal Peach to the upper eye chapeau.
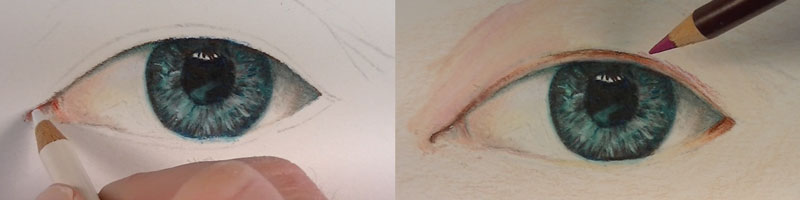
Shadowed areas are developed above and beneath the centre with Burnt Sienna and Dark Umber. The upper crease of the heart chapeau is also fabricated a bit darker and defined with Nighttime Umber.
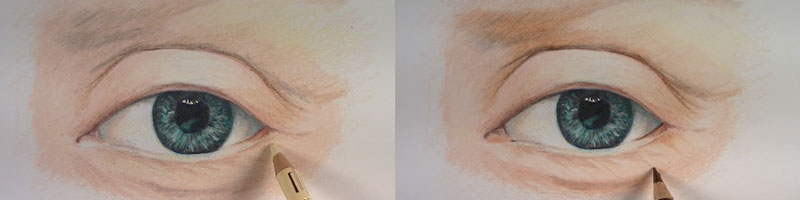
This entire area is then burnished with a heavy application of Low-cal Peach, Cream and White. With a buttery consistency developed, darker values are pushed further with Burnt Sienna and Dark Umber.
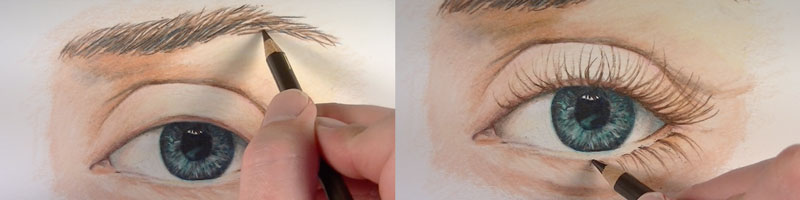
The eyebrows are fatigued by pulling out strokes in the direction that the hair would grow. Dark Umber is used initially. Indigo Bluish is applied on the bottom side to create shadow, depth, and contrast. Using the same progression of colors, the eyelashes can be fatigued. Here again, the strokes are pulled outward as the pilus grows.
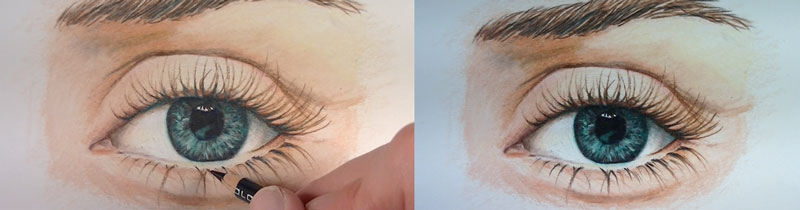
Indigo Blue and Dark Umber are layered to create a natural "blackness" for the eyelashes, completing the cartoon.
Want this step by step as a handy infographic? Just click on the image below to enlarge...
More Lessons Y'all'll Love...
Source: https://thevirtualinstructor.com/how-to-draw-realistic-eye-colored-pencils.html
0 Response to "Cool Drawings of Eyes With Color"
Enviar um comentário